Managing roles and permissions#
In this section:#
- Understand roles and security groups
- Learn how to set up a role
- Learn how to edit a role
- Learn how to create a security group
- Learn how to assign a role to a security group or members
- Learn how to restrict access by IP address
Before we begin:#
- Navigate to the Security section in the CMS menu.
Explaining security groups and roles#
Instead of assigning individual permissions to access, create, edit, or delete content per user, you can use Security Groups and Roles to organise which accounts have certain permissions.
Roles are collections of permissions. For example, you might create an editor role to give a group read/write access to all content, or a "contributor" role who has the right to add content to the CMS but not to publish it, or a "spectator" role which gives a person a right to view the backend of the CMS, but not any ability to edit it.
Security groups are collections of users, and whatever permissions they have apply to a subset of pages. So, for example, the marketing team could have access to the parts of the website dealing with marketing, and the customer support team could have access to the parts of the website dealing with customer queries.
One of the ways that the two can be used together is to assign similar roles to different groups. You only need to define an "editor" role once, but by applying the "editor" role to different groups with different access to different pages, so if you assigned the "editor" role to both the marketing team and development team security groups, the marketing team would be able to edit the marketing pages, and the development team would be able to edit the development pages, but they would not be able to edit each other's pages.
NOTE
Groups represent a group of members, and you can assign a Group with a set of roles which are descriptors for various permissions in the system e.g. a group which has the "Administrator" role, allows access to the CMS.
Using roles#
The most typical user roles:
- Administrator—has full rights for the management of the site, including the ability to create users and roles.
- Author—create and edit content, but not publish.
- Publisher—also can publish content.
These roles may be all you ever need, however, the CMS allows you to create as many different roles as are appropriate for your organisation.
Setting up roles#
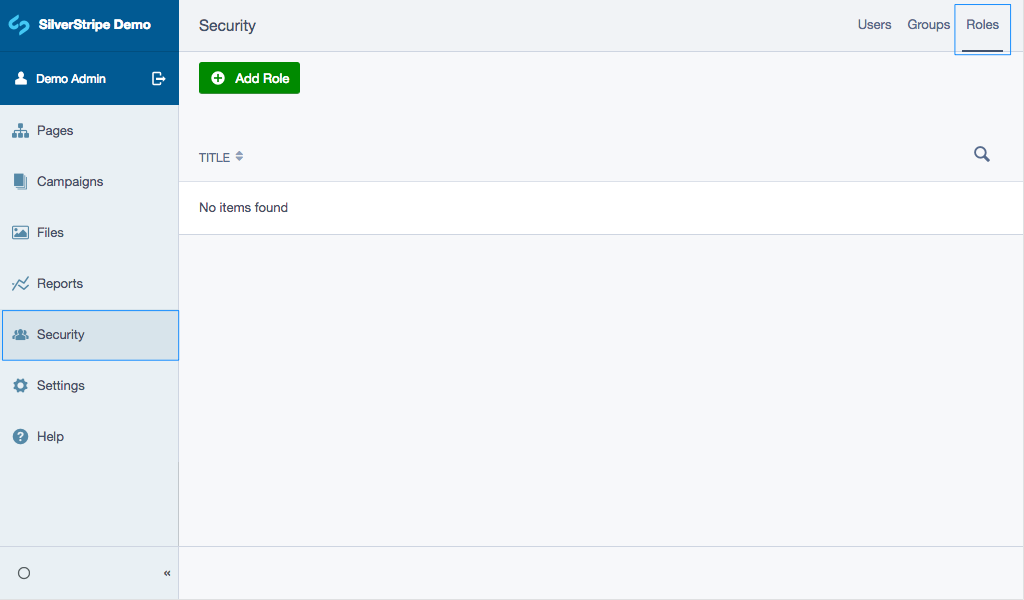
- Navigate to the Security section.
- Navigate to the Roles tab.
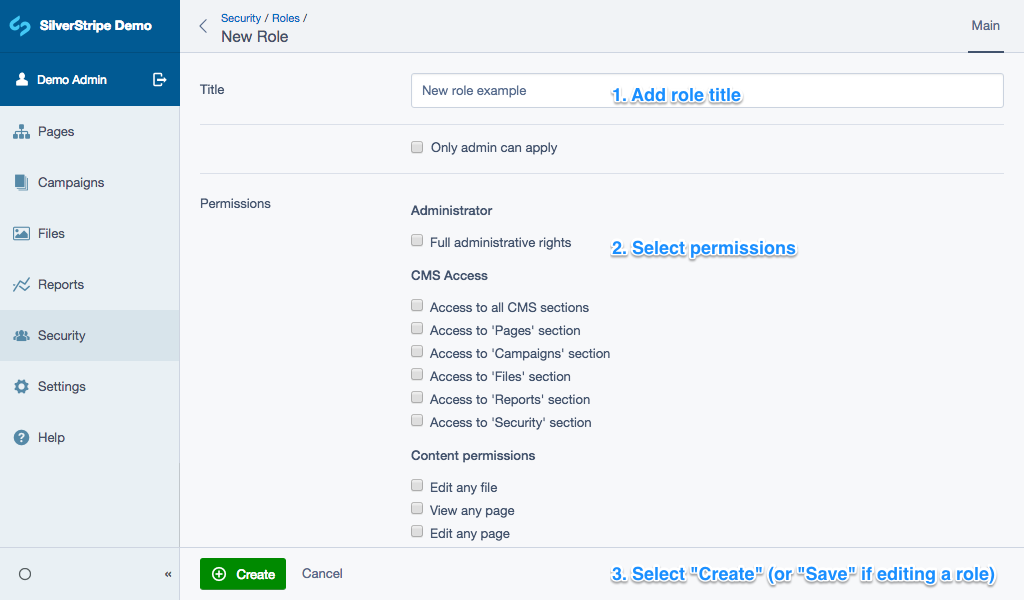
- Click the button Add Role. Enter the Title of the new role and appropriate permissions from the Permissions checklist. Hover over a permission checkbox label to see a tooltip with more information.
- Click the button Create. To navigate back to the Roles section either click the link Security in the breadcrumbs or the Back button which is shown as a left arrow in the Navigation toolbar.
NOTE
A role can have any number of permissions. For example, an author typically has "Access to Site Content," (they can access the "Site Content" section in the CMS; the part where all content is managed), "Access to Files & Images," (they can browse the "Files and Images" section in the CMS, organise assets in folders, upload new assets, etc.), and "Change site structure," (they can change the location for a page in the site tree and manage the site structure and navigation).
Editing roles#
To see details or edit an existing role, select the list item.
Using groups#
Each CMS user for your website belongs to one or more groups. For example, you may have a group who can only access the "News" section of your website, and another group who can only access the "Events" section of your website. The users in each group would be the people who manage the content for the respective section.
Unlike roles, there are no basic groups that typically apply to all sites. Instead, the groups you set up depend on your organisation, and who is involved in updating your website. We recommend thinking about who manages which areas or sections of your website, and then create groups based on those areas of responsibility.
Creating a new security group#
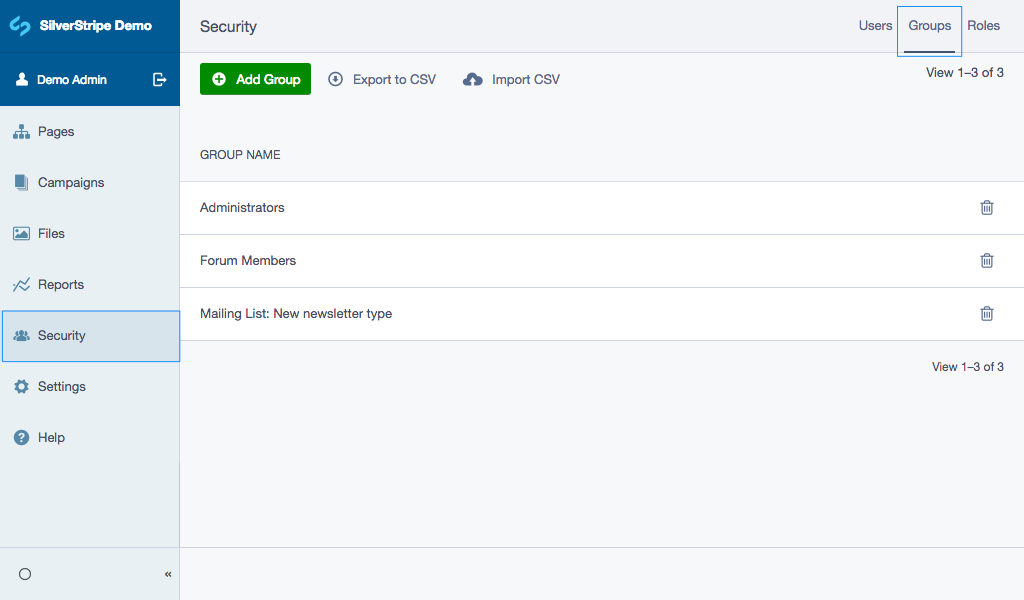
- In the Security section, navigate to the Groups tab.
- Click the button Add Group.
- In the Members tab add the group name in the Group Name field.
- Click the button Create.
NOTE
We recommend you set up a top-level group for your entire site, as well as for each section that is managed by specific people.
You can nest groups, and create sub-groups which may represent different roles. The parent group acts as a place to organise different subgroups. In this case, it's probably best not to add members directly to the parent group.
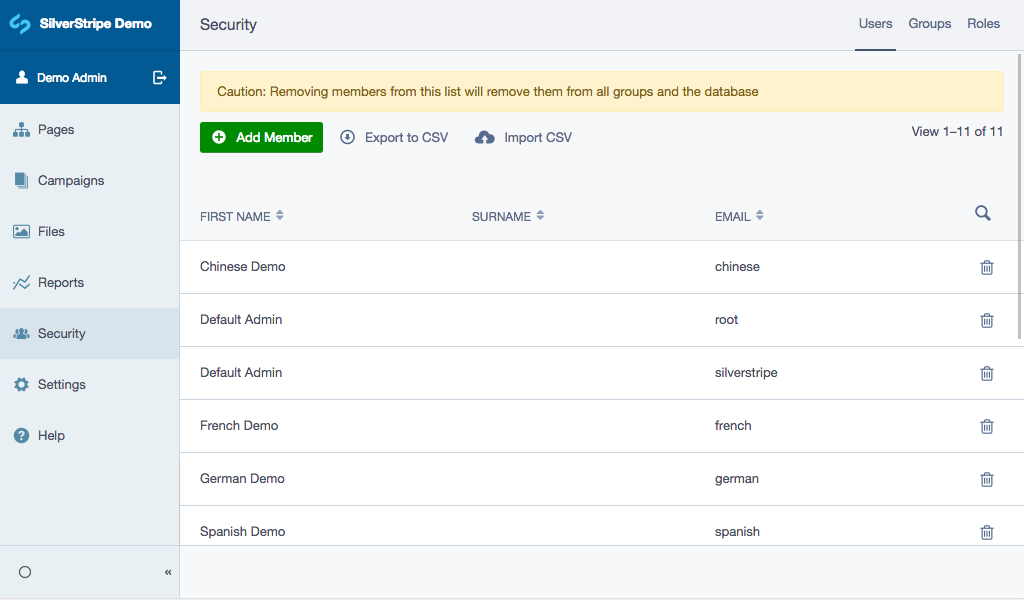
Adding members to groups#
- Navigate to the Groups tab and select a group you want to add members to.
- Navigate to the Members tab.
- When typing in the first name, last name, or e-mail address in the Find members by... dropdown field will show a choice of autocomplete names. Select the member you're looking for and click the button Link Existing.
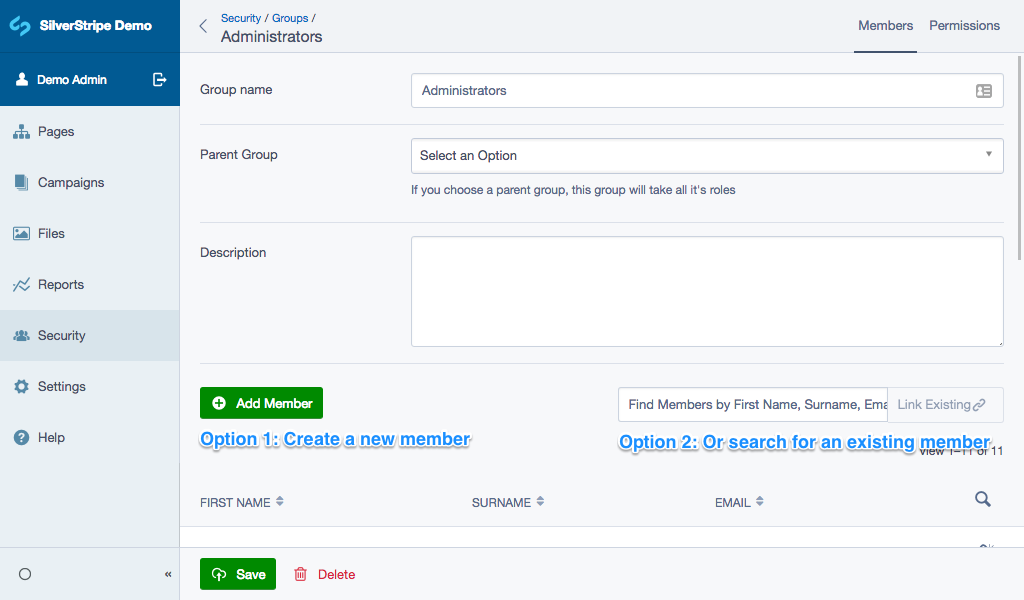
If you wish to add a new member instead of choosing from an already established member, click the button Add Member.
NOTE
Users can be in multiple groups. If you delete a user from a group, they are only removed from that group, not from the system. To fully delete a user, you need to be in the root of Security. To reach the security group root click the link Security or the Back button which is shown as a left arrow in the Navigation toolbar.
Editing and deleting groups#
- To edit a group, click the Group Name list item. This opens the group details. You can change the Group name, and add, edit or delete members.
- To delete a group, click the Delete button shown as a trash icon.
NOTE
Note that a single user can belong to more than one group and that deleting a group does not delete its members.
Assigning roles to security group members#
- To assign roles to security group members, click the Roles tab.
- Select the appropriate roles for your group and click the button Save.
Assigning permissions to security group members#
It is suggested that, where possible, permissions are assigned to roles, and roles are assigned to security group members. However, it is possible to assign permissions to security group members from the Groups section. Navigate to the Permissions tab which will allow you to apply additional permissions to a group.